

Hi crafty friends! Amber Mitchell here on the Simple Stories blog today to share with you a bright & colorful mini album that I created for summer. I used the new Summer Snapshots collection to build this entire album from start to finish and I am just in LOVE with how fun & happy it turned out!

The covers of this album were made using medium weight chipboard. I used two sheets that measured 4.5 x 5 inches. I wrapped these using sheets of patterned paper from the 12 x 12 Collection Kit that I trimmed down to 5.5 x 6 inches (this leaves a ½ inch tab of paper on all four sides of the chipboard, which is used to adhere the cover paper, or wrapping paper, to the chipboard).
Before adding the inside lining to the covers, I first attached the spine. To create the spine, I used a sheet of paper that measured 4.5 x 4.75 inches. On the 4.5-inch side, I scored at 1.5 and 3 inches. This creates a 1.5-inch spine with two 1.5-inch tabs on either end that I used to adhere the spine to inside edges of my front and back cover.
To give this album a bit more flair, I added a small sheet of paper around the tabs of the spine before adhering it to the covers. This created a fun wrap-around accent for the spine that I later added embellishments to. The only thing to note with this addition to the album is that it prevents the album from lying flat.
Once the spine was adhered, I added the inner linings to the covers which measured 4.25 x 4 7/8 inches.
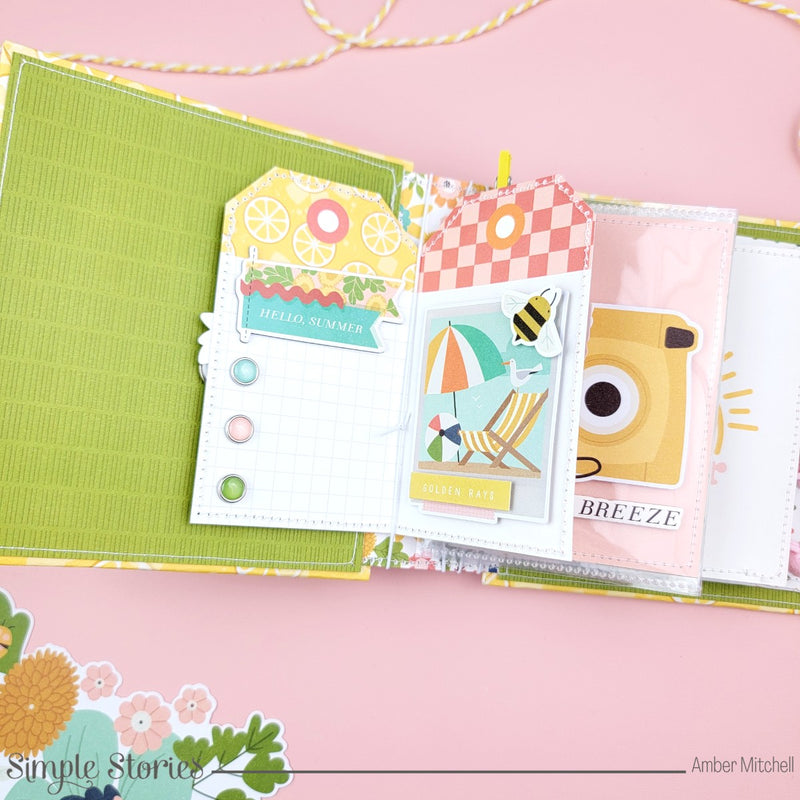
The pages of this album vary in size and shape.

For the first page, I used a pair of tags that I cut out from one of the patterned papers. I folded these in half to turn them into tag-shaped pages. The second page was made using a plastic photo sleeve that I trimmed down to fit in the album. This page folds out into three sections and can hold 3 x 4-inch journaling cards or photos. The third page was made from a pair of 4 x 4-inch cut-apart cards that I trimmed down and folded in half. I turned this page into a journal by adding bullet dot paper to the inside. The last page is a large envelope that I created using my We R Makers Envelope Punch Board. I used a Velcro dot to seal this envelope closed.

To bind all of these pages to the spine, I used white elastic thread. This is one of my favorite binding techniques as it is easy, simple, and quick to do. It also allows for pages of different sizes & shapes.
When it came to embellishing this album, I started with the spine and front cover. I used a few small die cuts from the Bits & Pieces pack to embellish the wrap-around accent on the spine, and also added a clip with a handmade pompom charm. On the front cover, I used a 3 x 4-inch Chipboard Frame and added a large flower from the Chipboard Stickers to the upper most corner of it. I added a journaling card behind this frame to tie everything together.

Throughout the rest of the album, I used a mix of the Decorative Brads, Foam Stickers, Cardstock Stickers, and die cut packs to create clusters and fill in any empty spaces on the pages and journaling spots.


This project has me looking forward to all of the fun, upcoming summer activities! I can't wait! Thanks so much for stopping by my post today. I'll see you next time with another fun project!
SUPPLIES: 12 x 12 Collection Kit, 6 x 8 Paper Pad, Bits & Pieces, Cardstock Stickers, Foam Stickers, Chipboard Stickers, Decorative Brads, Chipboard Frames.


0 comments