

Hello crafty friends! Amber Mitchell here on the Simple Stories blog today to share with you this fun, handmade 12 Day Advent Calendar that I created using the new “Holly Days” collection.
To create the base of this advent calendar, I used three pieces of medium weight chipboard. The cover pieces measured 5.75 x 8.5 inches, while the spine piece measured 2.25 x 8.5 inches.

The base of this project is quite large, so wrapping the chipboard requires a larger piece of paper. I created the wrapping by adhering three sheets of paper together. The two outer papers measured 6.75 x 9.5 inches, while the middle paper measured 5.5 x 9.5 inches. I adhered these papers end to end using strong, double-sided tape. The paper in the middle will become the spine, so make sure to choose a fun pattern that pops and contrasts against your cover patterns!
To line the inside of my base, I again used three sheets of paper. To match the outer spine, I used the same patterned paper to line the center of the inside of the base. This paper measured 5.5 x 8 inches. I glued this down, then took two papers that measured 5.5 x 8 inches and adhered them on either side of the center lining.

Next, I created a closure for the calendar. To do this, I took a sheet of paper that measured 2.25 x 7.5 inches. I scored this on the 7.5-inch side at 2 and 4.5 inches. I then adhered the largest segment of this sheet to the back cover. To hold the base closed, I created a tuck spot underneath an embellishment cluster that I added to the front cover.
Now, on to the fun part of this project: the boxes! This advent calendar is a 12 Day one, so I created 12 boxes. To create these, I took sheets of paper that measured 4.25 x 7.5 inches. On the 7.5-inch side, I scored at 1, 3.25, 4.25 and 6.5 inches. On the 4.25-inch side, I scored at 1 and 3.25 inches. I then used the six squares in each template to assemble the boxes by turning them into tabs.

Each side of the base can house six boxes. For easy opening and closing of these boxes, I adhered them down back-to-back, with their openings facing outwards. I did these in pairs of twos going down the length of each side of the base.
With the base of the project done, I moved on to my favorite part which is embellishing! The embellishments in the “Holly Days” collection are so vibrant and festive! I wish I could have used them all in this project!

To number the 12 boxes, I used 2x2 cut-aparts from "Holly Days". These worked perfectly and look so cute on top of the boxes. To decorate the gift boxes further, I used smaller embellishments found throughout the collection. The 12 x 12 Cardstock Stickers, Puffy Stickers and Decorative Brads were perfect for this.
To embellish the inner spine, I took a “Merry” sentiment from the Chipboard Stickers and framed it with some smaller snowflake stickers and some border stickers from the Sticker Book.

When it came to embellishing the cover, I first needed to create the tuck spot for my closure. To do this, I took a piece of chipboard that measured 4.5 x 6.5 inches and wrapped it using a plaid patterned paper. I love how this popped against the dark floral background. I then propped this piece up on the cover using foam tape, leaving the right outer edge open for my closure to slip into.
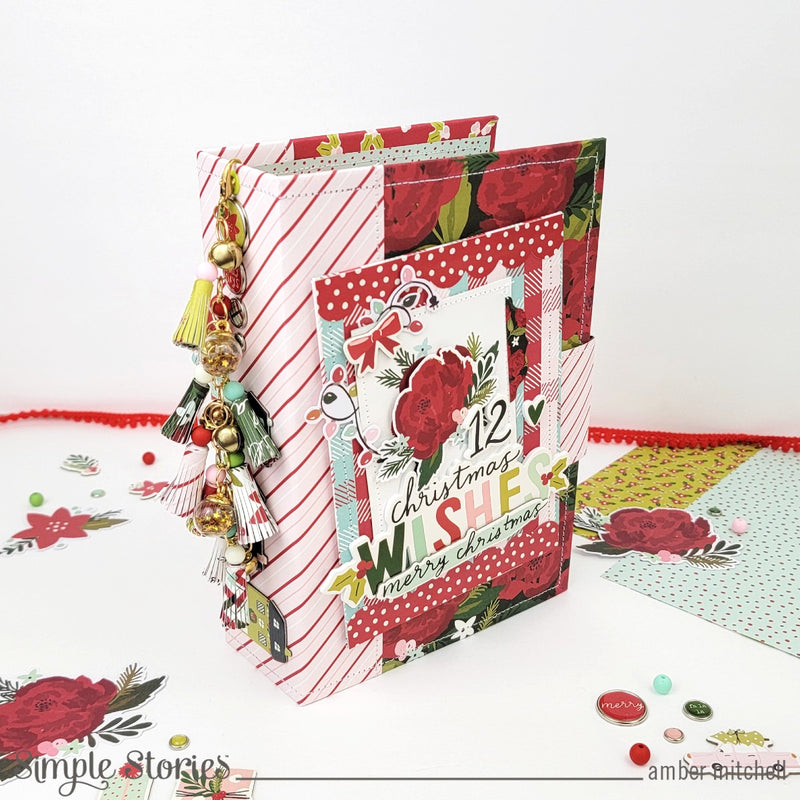
I used some of the Foam Stickers to create the title “12 Christmas Wishes” for my calendar. I layered this on top of a cut-apart from the 6 x 8 Paper Pad and continued to layer up embellishments from the Cardstock Stickers, Foam Stickers, Chipboard Stickers, and Bits and Pieces.

As always, I couldn’t declare this project finished until I added a cute dangle of paper tassels and charms to it. I made the tassels using a cut file and some scraps from the collection, and pulled some bauble charms, along with some jingle bells for extra fun, from my stash.

The finishing touch was adding a few house icons and a “Falalala” sentiment to the spine, along with some more of the Decorative Brads.

I can’t wait to fill this advent calendar with some sweet treats and gift it to that special someone this holiday season! Handmade gifts are always so fun to create, so I hope you’ll give this project a try! Thanks so much for stopping by my post today. I’ll see you next time with another fun project!
SUPPLIES: 12 x 12 Collection Kit, Cardstock Stickers, Foam Stickers, Sticker Book, Decorative Brads, Chipboard Stickers, Bits and Pieces, Puffy Stickers, 6 x 8 Paper Pad from HOLLY DAYS.


1 comment
What a great idea and sooooo stinkin’ cute! Love that it can be used year after year! Great job!